Category "Tutorials"

August 22, 2016

Engagement cake & Buttercream Textures

by mmcbakesadmin
BLOG, Tutorials, , , , , , , , , , ,
This is a semi-naked buttercream cake, which means that some of the cake shows through the buttercream, was made for an engagement party.  It has six layers of red velvet cake with cream cheese filling, topped with my vanilla bean French macarons, and fresh white roses.  I think this type of buttercream finish works for a variety of occasions, such as anniversaries, birthdays, rustic style weddings, baby showers, and more!  The “Love” cake topper is from Target.  Congrats on your engagement Anne & Ronel!? So happy to be part of your special day! I’m a San Diego based cake artist with a licensed home baking business. I like to share quick cake decorating tutorials and ideas under one minute long. Please LIKE & subscribe for more cake videos! THANKS! MMC BAKES For local San Diego order inquiries, please visit my website: https://mmcbakes.com FOLLOW ME! Instagram: https://www.instagram.com/mmcbakes/ Facebook: https://www.facebook.com/MMCbakes/

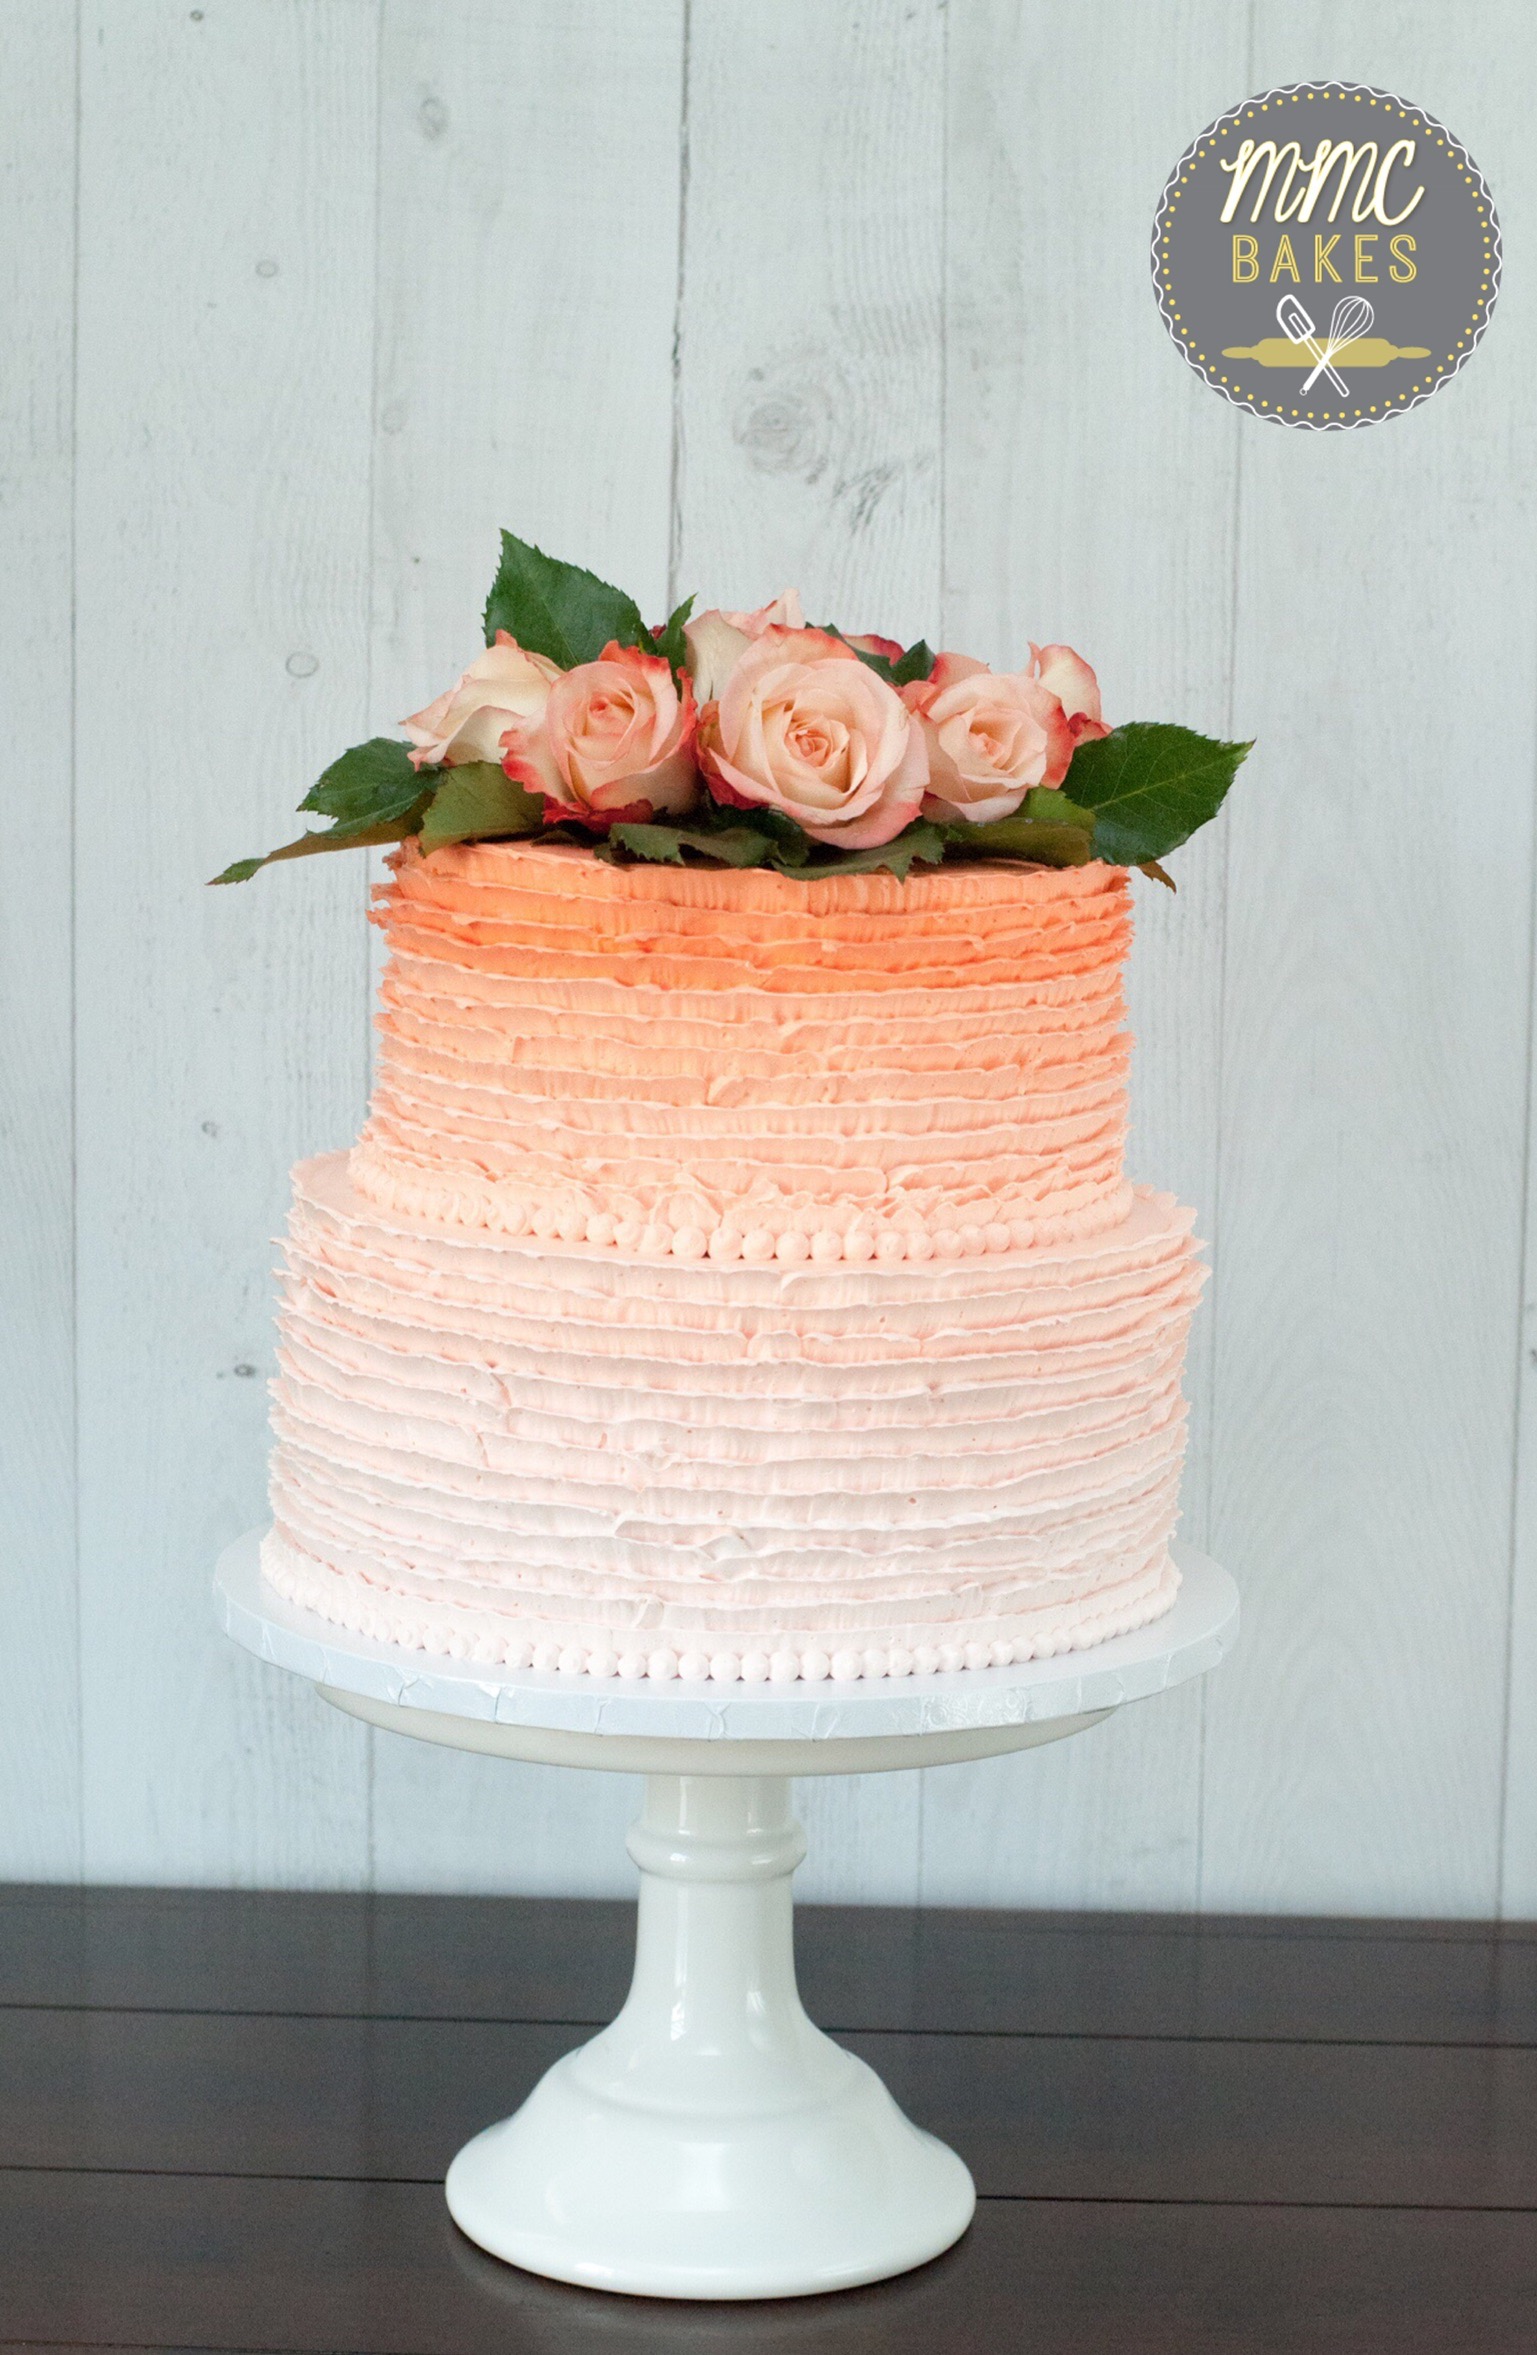
Here are more examples of buttercream textures & color styles.

mmc bakes, little man cake, baby blue, mustache cake, baby shower cake, san diego, chula vista, custom cake, buttercream cake, chevron, bow tie, mustache, baby shower, two tier, mustache cakeSmooth/Solid Color

travel cake, watercolor buttercream, mmc bakes, chula vista custom cakes, san diego cakes, filipino cake, filipino dessert, philippines flag cake, philippines cake, bon voyage cake, ube flan cake, birthday cake, airbrushed cake, sendoff cakeSmooth/Airbrushed Color travel cake, farewell cake, buttercream textures, buttercream clouds, watercolor buttercream, mmc bakes, chula vista custom cakes, san diego cakes, airplane cake, bon voyage cake, ube flan cake, birthday cake, baby shower cake, sendoff cakeSmooth/Watercolor

purple ombre rustic buttercream ube flan cake mmc bakes custom cakes san diego chula vistaRustic Horizontal Stripes/Ombre

striped buttercream cake, buttercream textures, macarons cake, buttercream, mmc bakes, chula vista custom cakes, san diego cakes, engagement cake, ube flan cake, birthday cake, baby shower cake, anniversary cakeHorizontal Stripes/Ombre Airbrushed

mmc bakes chocolate lovers french macarons cake san diegoRustic Diagonal Strokes
IMG_1694Petal Buttercream

mmc bakes smash cake first birthday san diego custom cakesStar Buttercream

rustic cake, buttercream textures, cake, buttercream, mmc bakes, chula vista custom cakes, san diego cakes, woodsy cake, ube flan cake, birthday cake, fall cake, thanksgiving cakeRustic Stripes/Airbrushed Tree Texture

mmc bakes buttercream vintage ruffle cake, san diego, chula vistaUpward Micro-Ruffles

buttercream ruffle cake, buttercream textures, chocolate ruffle cake, buttercream ruffles, mmc bakes, chula vista custom cakes, san diego cakes, birthday cake, baby shower cake, anniversary cakeCurly Ruffles

mmcbakes, basketweave cake, russian piping tips nozzles flower buttercream basket cake san diego chula vista custom cakeBasketweave Buttercream

mmc bakes, san diego, chula vista, custom cakes, buttercream cake, ombre rosette cake, violet ombre, ube flan cake, buttercream rosettes, baby shower cake, wedding cake, birthday cakeRosette Buttercream

Check out my blog post on

Rosette Buttercream Cakes!

semi-naked cake, buttercream textures, red velvet naked cake, buttercream, mmc bakes, chula vista custom cakes, san diego cakes, engagement cake, birthday cake, baby shower cake, anniversary cakeSemi-Naked Buttercream

mmc bakes buttercream cake san diego custom cakes chula vista Mix textures: Smooth & Rustic

Don’t see a texture you like?  Send me a photo, and I’ll let you know if I can duplicate it!

Homemade Fondant – Tutorial Tuesday

April 29, 2014
by mmcbakesadmin
Tutorials, , , , , , , , ,
 

Homemade Fondant

Hey guys!  For this Tutorial Tuesday,  I thought I would share how I learned how to make fondant at home.  I want to share my resources and tips that I used to help you in case you were interested in taking a stab at making your own homemade fondant too.  There are advantages and disadvantages to making your own fondant, and I’m not against buying ready-made fondant either.  So take a look and see if you’re up to it!  It’s not easy and it takes practice, but it’s very rewarding as well! Last year, my goal was to make my son’s first birthday cake with fondant. Above are pictures of my very first attempt.  That was the very reason how I started baking! Advantages to making your own fondant:
  • It tastes GREAT unlike most pre-made fondant found in stores
  • You can flavor it with any extract or emulsion that you want & match the type of cake you’re covering
  • Save money!  The ingredients don’t cost much at all!
  • Make custom colors you couldn’t find in stores.
  • It feels like a great accomplishment when you get it right!  It’s a skill I plan to use a lot, so it’s worth the trouble!
Disadvantages to making your own fondant:
  • It takes some equipment you probably don’t have, unless you bake or cook a lot.  I think you need to use a stand mixer if you want to save time, energy & elbow grease.  If you don’t want to buy any new equipment, just buy your fondant!
  • It takes time & practice to get the right consistency.  It gets really stressful if all you have is your own homemade fondant, and you’re trying to decorate a cake & it keeps sticking to your work surface!
  • Since I’m not an expert on homemade fondant, I think it’s only best for smaller cakes.  Consistency is key for properly covering a large cake & that’s the toughest part about making your own.  Pre-made fondant shouldn’t give you much trouble, then again, I have never really made a cake with pre-made fondant.
Below is the resource I used to learn how to make fondant.  I found it among a sea of many “How to make fondant” videos on YouTube, and this by far was my favorite because it was clear & easy to follow. “How to make Instant Fondant with Christina Marie Vega-Gluch”   Ingredients for homemade fondant:
  • 1 (16 oz.) pack of mini marshmallows (I like Kraft brand)
  • 2 pound bag of SIFTED Powdered Sugar (I like C&H brand, it’s already pre-measured in a 2-lb size)
  • White vegetable shortening (I like plain Crisco, don’t use butter flavor or it will color your fondant yellow)
  • 2 tablespoons water
  • 1 tablespoon extract or flavor emulsion like vanilla, butter, or almond
  • 1 tablespoon light corn syrup
  • 1/2 tsp salt
  • gel food coloring of your choice
I’ve only made four cakes using my own homemade fondant, and I learned so much every single time.  I admit I still haven’t quite mastered making homemade fondant to the point that it’s perfect each time but I’m getting closer to that point. Below are some important tips I learned from experience:
  • I suggest working with store-bought fondant for your first time to understand the consistency of good fondant.
  • Make the fondant the day before you plan on putting on the cake to prevent the fondant from drying out.  I have also found that it’s more pliable when it’s fresh!
  • Use a stand mixer! If not, don’t bother trying to make it on your own just kneading it; it will take FOREVER!
  • Sift you powdered sugar! Don’t be a lazy bone!
  • Use brand name, not generic, marshmallows & powdered sugar.  If you go cheap, you’ll have fondant that dries out easily!  I learned the hard way!
  • Color the marshmallows before you add the powdered sugar if you only have one color you want to use.
  • Let the mixer do the majority of the work for you!  It take about 30-45 minutes for me to get the right consistency.
  • Gradually add the powdered sugar & watch for the proper consistency; you may or may Not need all the powdered sugar.
  • I like to use cornstarch for dusting the work surface instead of powdered sugar.  Just use it sparingly so you don’t dry out your fondant.
  • After mixing & it looks doughy & not sticky like fondant, take it out the mixer & knead it until it has a perfect, soft, pliable & NOT STICKY.  Store it tightly wrapped with Saran Wrap so no air gets into it & put it in the fridge.  It needs to be at room temperature when you’re ready to use it.
  • If you have a big cake, to me thats bigger than a 9″X13″ cake (i.e. bigger than the #1 cake I made below), just buy pre-made fondant.  For me, it’s difficult to make a giant single piece of fondant to cover the cake that doesn’t rip.  I would only use homemade fondant for small cakes.
Hope this helps! – MMC Bakes It feels great to be able to think of the future & looking back at these photos with my son telling him that Mommy made his cakes! 🙂    

Flan Cheesecake – Tutorial Tuesday

April 22, 2014
by mmcbakesadmin
Tutorials, , , , , , ,
FLAN CHEESECAKE This is Filipino-style leche flan with cream cheese to add a rich, creamy texture, that’s not too sweet.  You can feel free to omit the cream cheese to make regular flan; just drop the vanilla extract to 1 tablespoon & the rest of the recipe stays the same.  Serves about 6-8. Ingredients: 1 cup sugar & 1 tbsp water for caramelizing tops 7 large egg yolks 1 (12oz.) can of evaporated milk 1 (14oz.) can condensed milk 4oz. (Half package, softened) Cream Cheese 1.5 tablespoons vanilla extract Instructions: 1) Preheat oven to 350 degrees. Caramelized top of flan: Melt sugar & water over med-high heat until liquified to a caramel color. Stir constantly & watch carefully to ensure not to burn. 2) Once all sugar has melted, remove from heat & immediately pour into baking pan sprayed with non-stick oil. Pour enough to cover the bottom of the pan. 3) Combine egg yolks, softened cream cheese, evaporated milk, condensed milk & vanilla extract in a blender & blend until fully incorporated. 4) Pour into pan with caramelized top(s). Fill almost all the way to the top; it won’t rise much. 5) Put pan in a water bath, which is another pan & fill it with warm water. This will help the flan bake gently. 6) Bake for about an hour for 8-9″ pan or glass. 6″ pan (deeper) will be 1.5 hrs +. This mini heart pan takes about an hour. If you use a thick pan or your flan is deeper, it takes longer to bake, about 2 hours. Stick a toothpick to check if flan is firm all the way though. If not, add 15 min increments. 7) After baking, allow it to cool down completely.  Refrigerate for about an hour.  Run a knife along the sides of the pan & flip the flan over until released. ENJOY! – MMC Bakes